Sometimes the smartest solutions are the simplest ones. What many homeowners overlook as a minor chore can actually have a major impact on safety, energy efficiency, and long-term savings. One surprisingly effective home maintenance tip—passed down from a grandmother—has recently gained attention for all the right reasons.
And once you see how it works, you might wish you had known it sooner.
The Hidden Danger Inside Your Home
Most people assume their dryer is safe as long as the lint trap is cleaned regularly. But what many don’t realize is that lint continues to build up deep inside the dryer vent system—far beyond what you can see.
This buildup isn’t just inconvenient—it’s dangerous.
Lint is highly flammable, and clogged vents are one of the leading causes of household fires. At the same time, restricted airflow forces your dryer to work harder, increasing electricity usage, raising utility bills, and shortening the lifespan of the appliance.
A Simple Method That Actually Works
Instead of relying on expensive professional services, this method uses basic tools most people already have at home:
- A vacuum cleaner
- A flexible vent brush
- A leaf blower
The process is straightforward but highly effective when done correctly.
Step 1: Start With Safety
Before anything else, unplug the dryer. If it’s a gas unit, turn off the gas supply as well. This ensures you can clean safely without risk.
Then, gently move the dryer away from the wall to access the vent.
Step 2: Remove Surface Lint
Video: The Best Way To Clean Your Dryer Vent
Use a vacuum with a hose attachment to clean around the vent opening and the floor behind the dryer. Even if you clean the lint trap regularly, this area often collects more debris than expected.
Step 3: Deep Clean the Vent
Insert a flexible vent brush into the duct and slowly rotate it to loosen built-up lint inside. This step is crucial, as it reaches areas that are typically ignored.
Follow up with the vacuum to remove loosened debris.
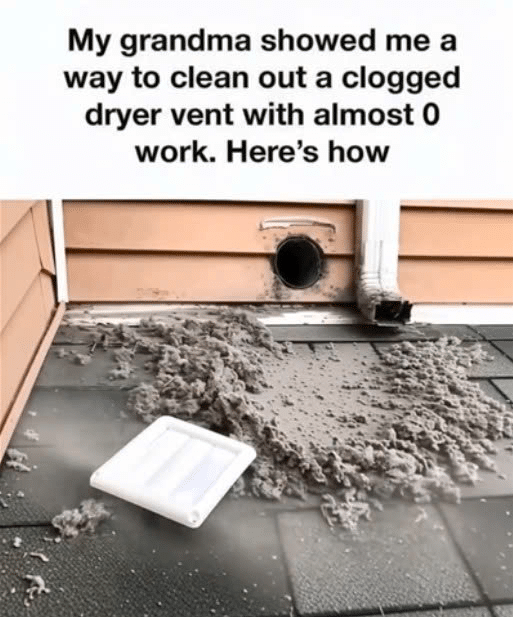
Step 4: The Game-Changing Trick
Here’s the step that surprises most people.
Go outside to where the vent exits your home. Remove the vent cover and use a leaf blower to push air through the system.
This clears out remaining lint and restores full airflow—something that basic cleaning alone often misses.
Step 5: Reassemble and Test
Reconnect everything, place the dryer back, and run a short cycle.
If done correctly, you’ll notice immediate improvements:
- Faster drying times
- Lower energy use
- Reduced heat buildup
- Better overall performance
Why This Matters Financially
This simple maintenance routine doesn’t just improve safety—it also saves money.
- Lower electricity bills
- Fewer repair costs
- Extended appliance lifespan
In the long run, this small effort can prevent expensive problems and even protect your home from fire-related damage.
A Lesson That Stands the Test of Time
What makes this story special isn’t just the method—it’s the reminder that practical knowledge often comes from experience, not expensive tools or services.
Sometimes, the best solutions are the ones passed down quietly—simple, effective, and easy to overlook.
Final Thoughts
In a time when people often rely on costly fixes, this approach proves that a little knowledge and effort can go a long way.
Cleaning your dryer vent might seem like a small task, but it can make a big difference—for your safety, your finances, and your peace of mind.